Suchen Sie etwas anderes?
Table of Contents
Scenario Details
Every day remote control applications are becoming more common. Usually, such applications require remote access to an image or video located on a remote camera in places where there is no direct access to the camera via traditional methods such as an ADSL connection; for example, in solar plants, abandoned stations, etc. In such cases, the only option is to use a 3G router which provides remote access.
This application note includes a practical step-by-step guide of how to use and connect to the IP camera using the MTX-Router-Titan-mini 3G device, including an explanation of how to use your 3G-enabled smartphone to obtain a real-time video image or even control the camera’s movement (up/ down, left/right).
Necessary Hardware
- MTX-Router-Titan 3G or MTX-Router-Titan-mini 3G with 3G antenna and power supply
- Motorized IP camera (in the following example a Tenvis JPT3815 will be used, although any IP camera is sufficient)
- SIM card with data (3G) enabled (in this example a Movistar SIM will be used)
Configuring the MTX-Router-Titan 3G device
The first step is configuring the MTX-Router-Titan 3G device. For this, you will need to connect a network cable between your PC and Titan router, and then open an Internet browser. The default IP address is 192.168.1.2. Therefore, your PC should be configured using a static IP address in the range 192.168.1.X; for example, using the LAN address 192.168.1.10.
Once completed, go to the address http://192.168.1.2 in the Internet browser, which should lead to the following screen where the router can be configured.
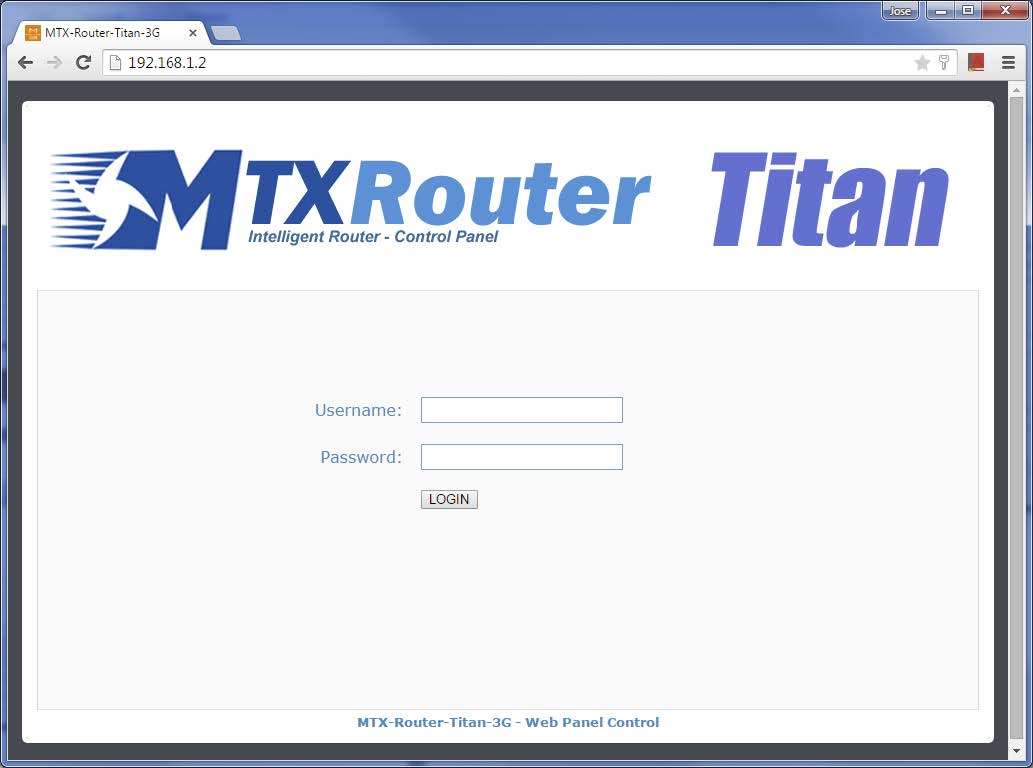
The default username and password is admin/admin. Enter these details and click “LOGIN”. First we will configure the network parameters for the SIM card we are using. Go to the menu “Wan > Basic Settings”. The screen below will appear. This will only require changes if you are using a SIM card that does not belong to the network provider Movistar. In this case, the following parameters should be changed: APN, Username, and Password. If you do not know the values that should be entered, contact your network provider. Remember that a SIM card using a public IP address is required (a private IP address, such as 10.X.X.X will not work).

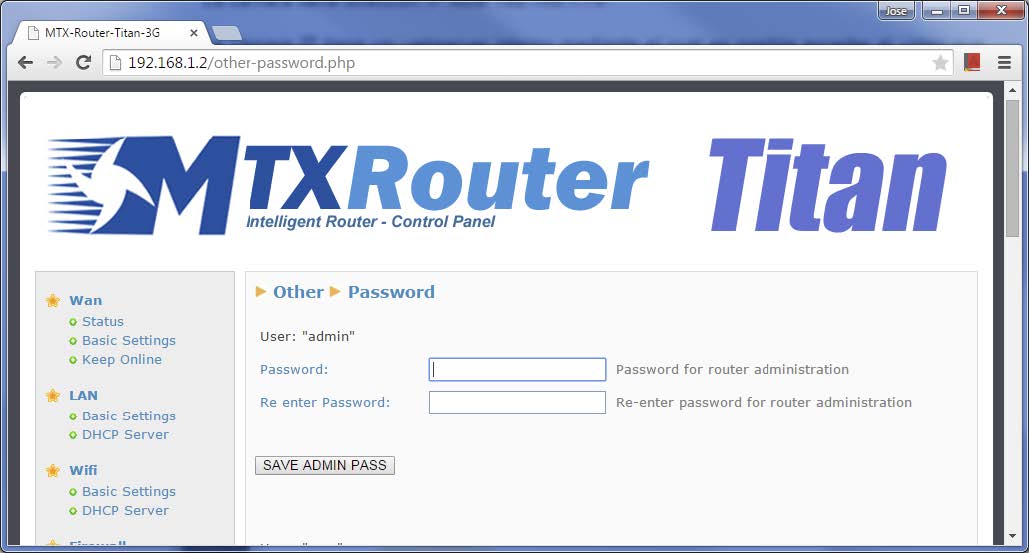
After, we must change the password. To do so, we must go to the menu “Other > Password”. Press the “Save Admin Pass” button to save the changes.
The last step is to configure the NAT. Given each IP camera model is different, this application note will not enter in detail regarding the steps to be taken. However, below is a screenshot of the configuration of the model used for this application note (Tenvis JPT3815) for reference purposes:
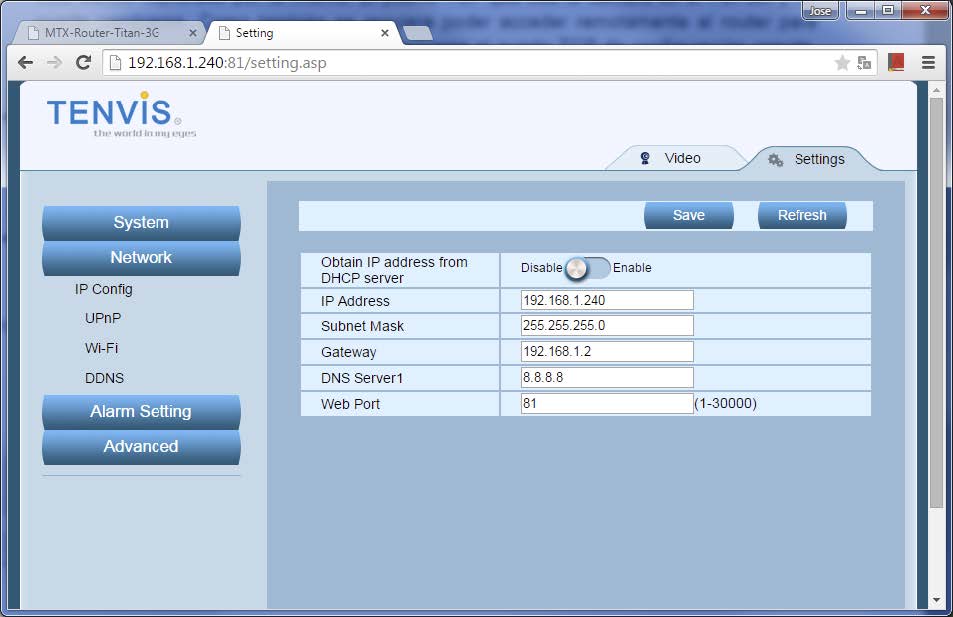
In summary, the IP camera has the fixed IP address (DHCP disabled) 192.168.1.240 and subnet mask 255.255.255.0. It is necessary to define the Gateway as the LAN IP address belonging to the Titan router, which is why we have input 192.168.1.240. Finally, the web port has been chosen as TCP 81 for simplicity (this way, via port 80 the Titan configuration can be accessed remotely, and via port 81 the IP camera can be accessed).
With this configuration now complete, we can begin to configure the MTX-Router-Titan-mini 3G NAT. For this, we access the menu “Firewall > Nat”, where we add the following rule:

This rule redirects all incoming traffic from the router port 81 (via a 3G connection) to port 81 at the IP 192.168.1.240, i.e. port 81 on the camera.
The last thing we must configure is the router (MTX-Router-Titan-mini 3G) to use the free NO-IP service in order to obtain a public IP address in case a SIM card with a dynamic IP address is used. To use the NO-IP service (www.noip.com), you must create an account and add a host. In the case, the host “titan3g.no-ip.org” has been created, as can be seen in the following screen:

Now we will configure the MTX-Router-Titan-mini 3G in order to use the NO-IP account we have just created. For this we must go to the menu “Other > DynDNS” and enter the following configuration values:
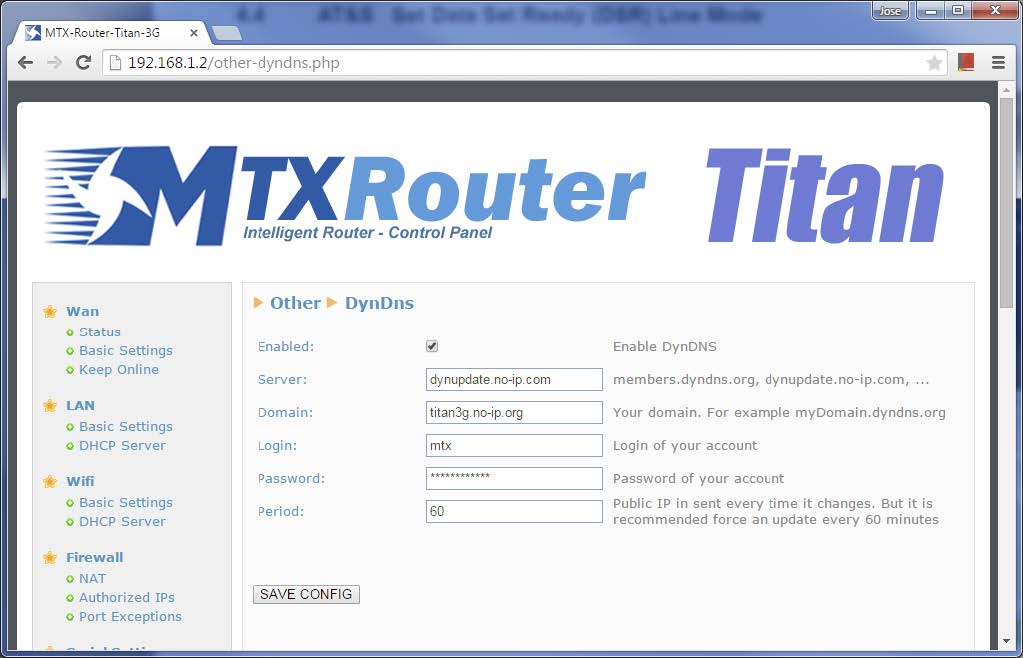
Each field must be the same as above, with the exception of the “Domain” values (where the host created at www.no-ip.com must be indicated), and your “Login” and “Password”.
Now, we must restart the router for the configuration to be effective. To do this, we must go to the menu “Other > Reboot” and press the reset button. The final step is to connect the IP camera to the MTXRouter-mini 3G device using an Ethernet cable. Once connected, wait until the router retrieves an IP address and updates the NO-IP server. This process could take up to two minutes, but in most cases, is much quicker.
Connecting to the IP camera using the MTX-Router-Titan-mini 3G
In order to check that we have correctly configured everything, we will first check that we have remote access to the MTX-Router-Titan-mini 3G configuration. To do this, we must open a browser in our PC and use the host we created, inserting the URL created at no-ip.com. In this case, we would connect to: http://titan3g.no-ip.org:81.


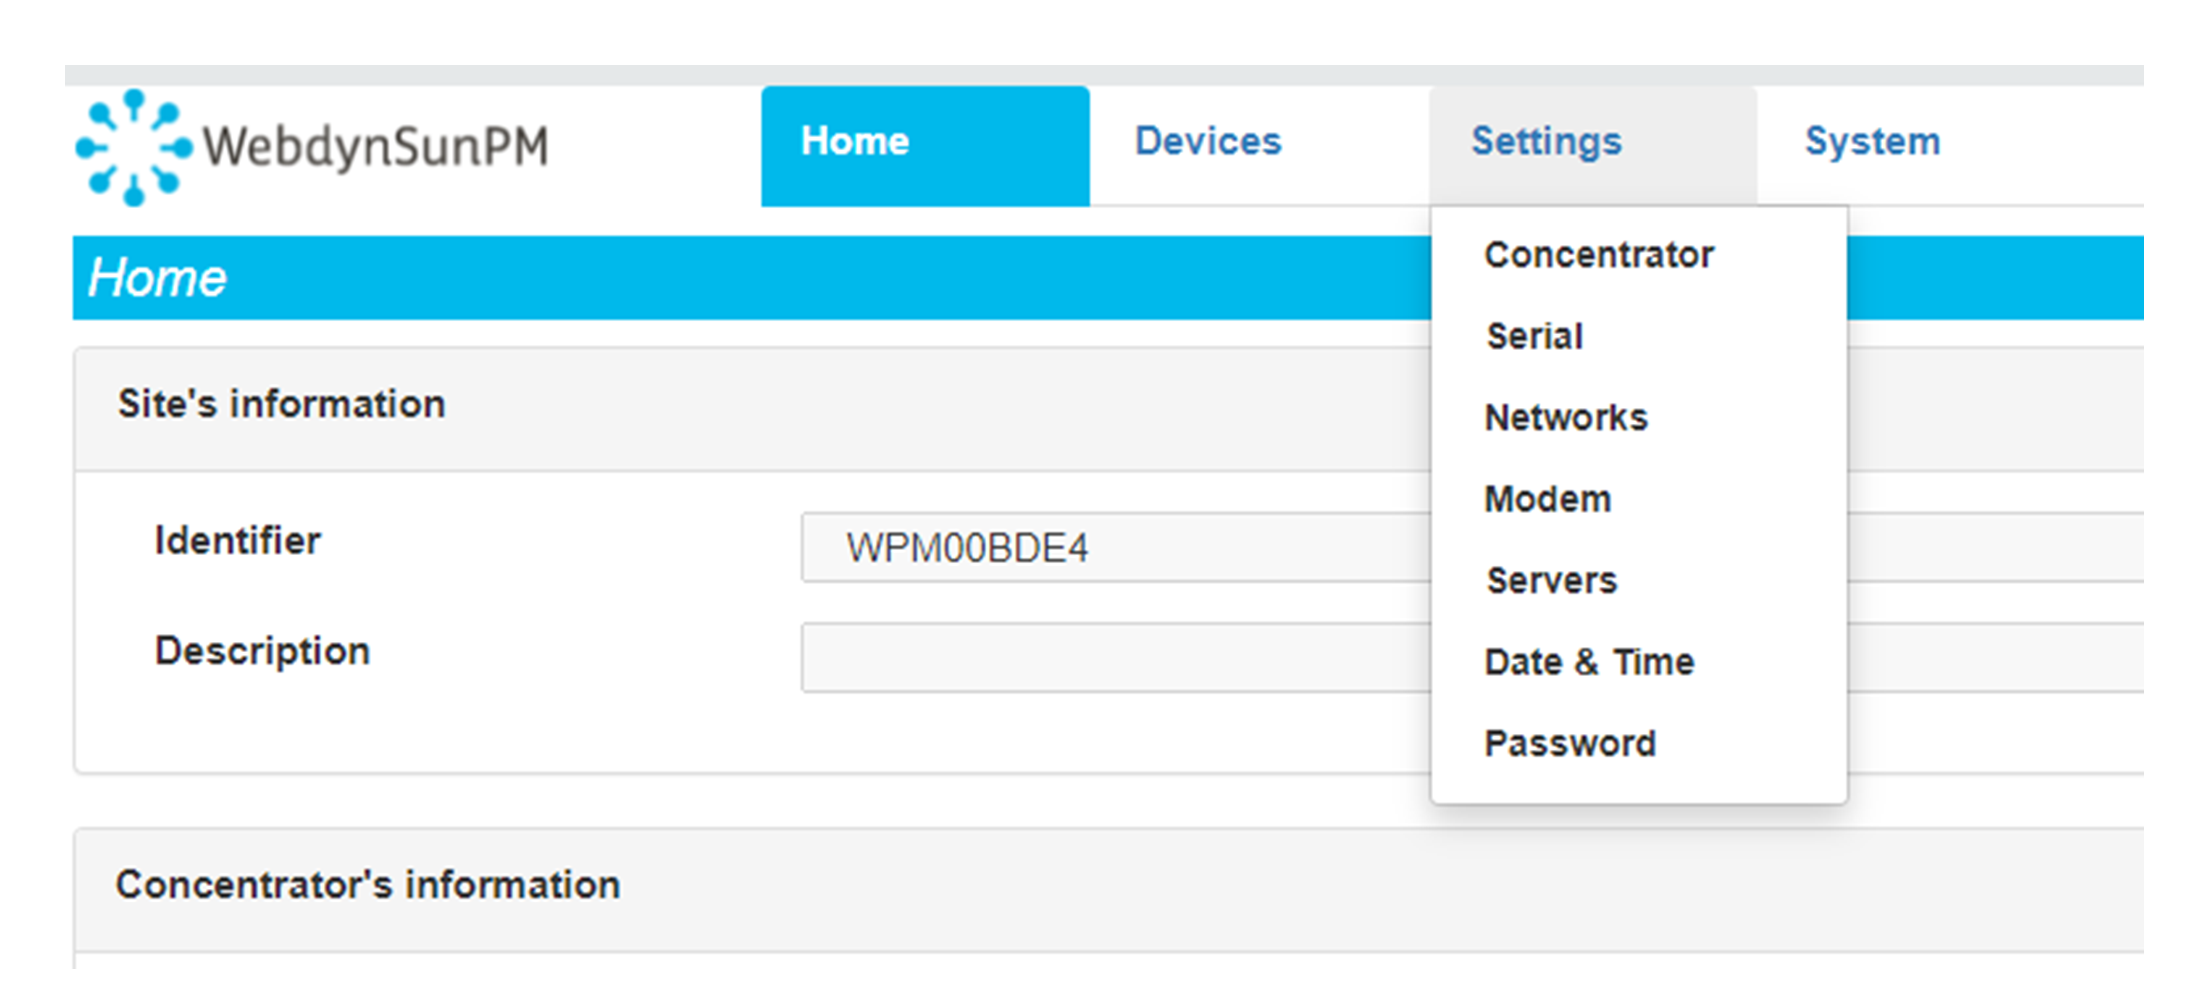 Enter the “ethernet” or “modem” connection type:
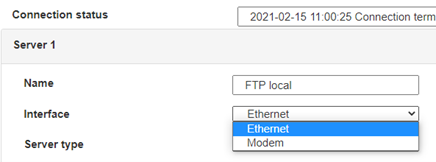 For an ethernet configuration, make sure the IP parameters are compatible with server access according to the concentrator local network configuration. For an ethernet connection, the configuration must be compatible with the concentrator’s local network topology so that it can access the servers. This configuration is done from the “Networks” configuration page (see section 3.2.2.3: “Networks”).
For a modem connection, the modem configuration must be correct before a connection can be set up. This configuration is done from the “Modem” configuration page (see section 3.2.2.4: “Modem”).
The parameters for the servers to be configured are at least the following:
 Therefore the following fields need to be configured: “Interface”, “Type”, “Server type”, “Address”, “Port”, “Login” and “Password”.
The other fields can be left at the default values subject to the directories having been properly created beforehand. See section 3.1.2: “Configuration files” for more details.


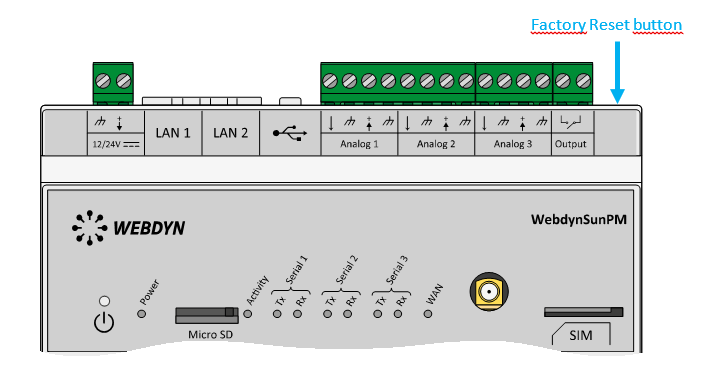 Wait. The concentrator will reboot using its factory configuration.


