Suchen Sie etwas anderes?
Table of Contents
Scene Details
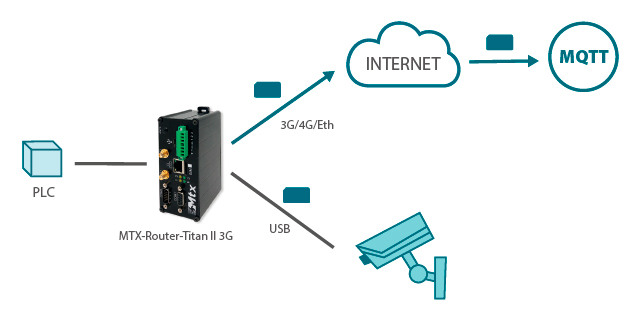
Remote control applications are more usual every day. Many of these applications need access to the footage of a remote camera. In many places there is no access to ADSL in order to connect directly an IP camera. For example solar gardens, distant stations, etc. In these cases we need a 3G/4G router to allow remote access.
This application note is a quick guide with step by step examples on how to use and connect an USB webcam to an MTX-Router-Titan II 3G. After reading this note you will know how to capture footage and send it via MQTT.
Hardware Needed
- MTX-Router-Titan II 3G with antenna and power chord
- USB webcam
- USB-micro USB (OTG) cable adaptor USB
- 3G/4G data SIM card
MTX-Router-Titan 3G WAN Configuration
To configure the router we connect it to our PC. Then we open our Internet browser. The router has a default static IP address 192.168.1.2, so we will need to configure our PC with a static IP within the range of 192.168.1.X, for example we configure the LAN address 192.168.1.10 on our PC.
Then we go to http://192.168.1.2 to go directly to the next start screen of the router configuration.
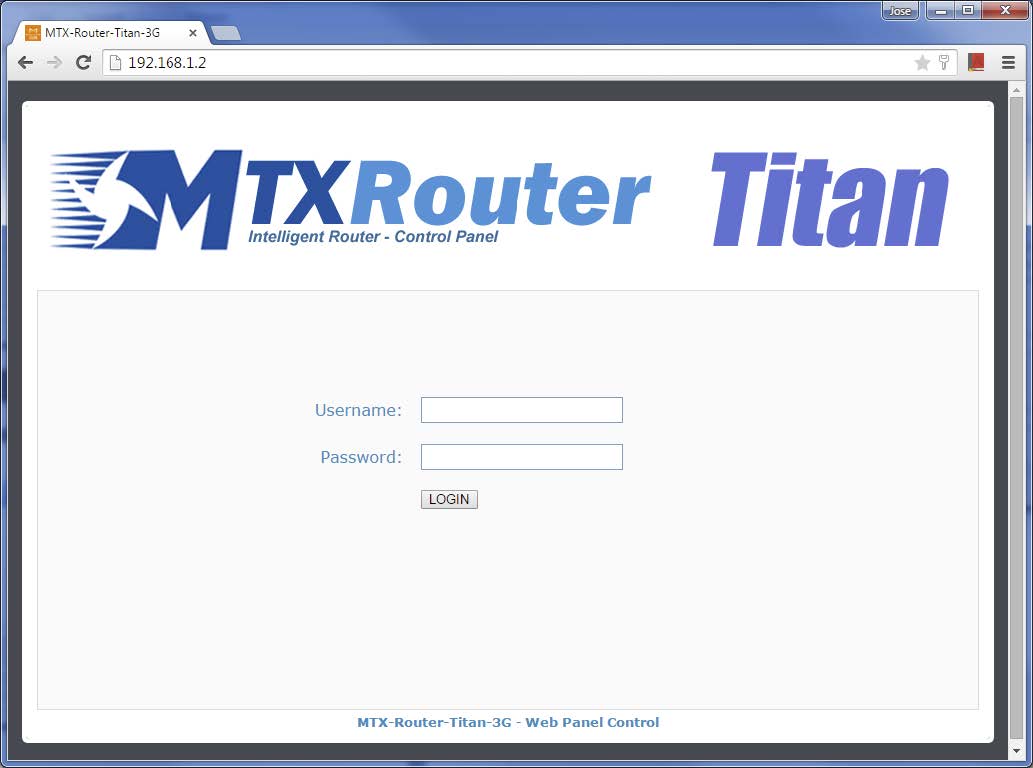
The default username and password are “admin” and “admin.” We will start by configuring the network parameters for the SIM card we are using. To do that we go to “Wan > Basic settings.”
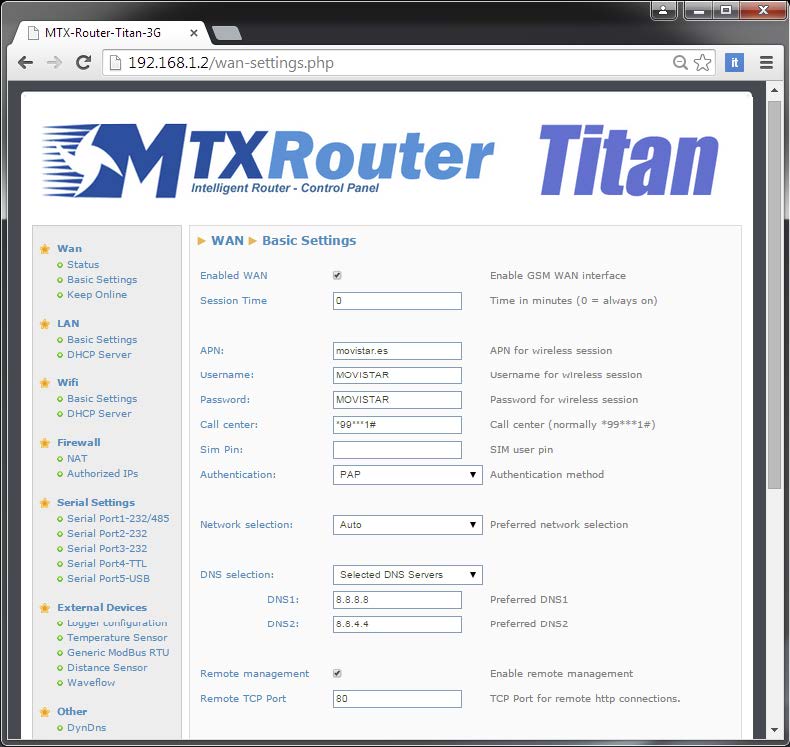
Configuring Titan for the Reading of Modbus Devices
Then we need to change the password. To do that we go to “Other > Password” and click on “Save Admin Pass” to save the changes.
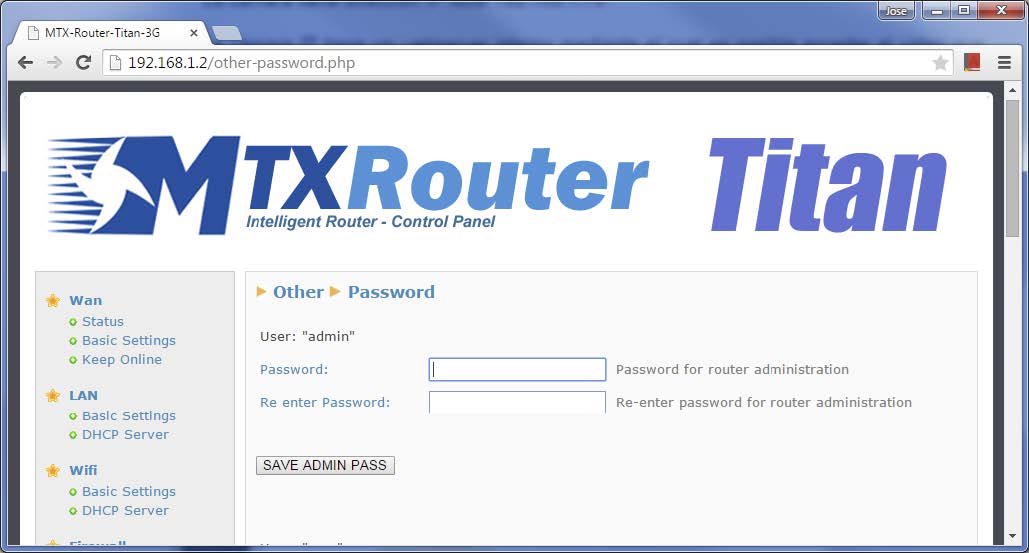
Configuration of the MQTT Section of the Router Titan
We are going to configure the MQTT service of the Titan router. We need to do this because the footage will be transmitted this way. To do that we need to access the section Other > Mqtt:
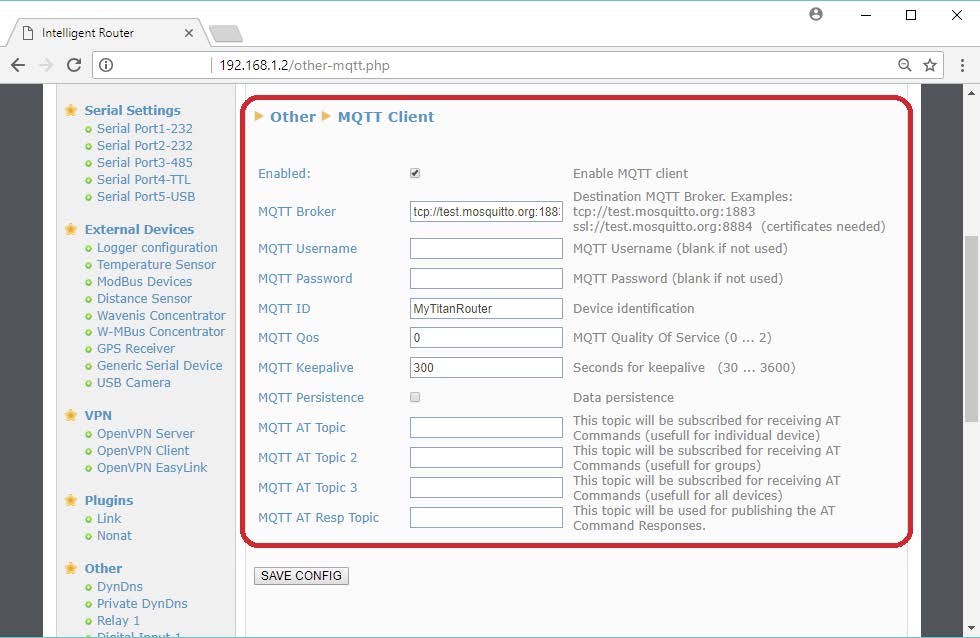
We will specify the following: click the box “Enable” to activate the service, the MQTT Broker we use, and the MQTT ID to identify our router. We click on “SAVE CONFIG.”
Taking a Picture Every Min. and Sending it Automatically via MQTT
In this configuration, we make the Titan router to take a snap every minute and to send it via MQTT. It is a simple process and it is done from the section “External Devices > USB Camera.”
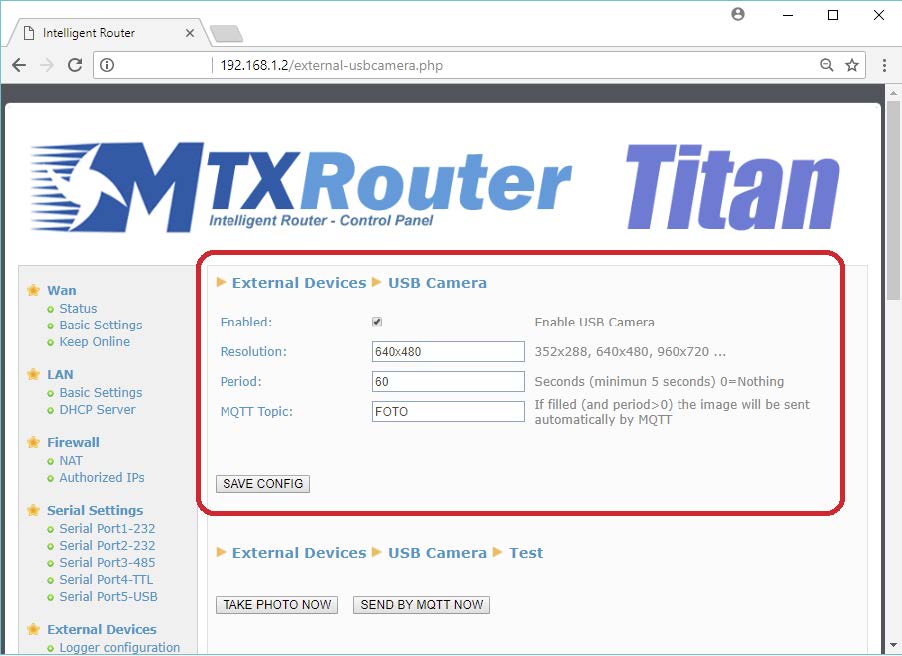
On this section, we enable the service clicking on the box “Enabled,” we specify the picture resolution (in this case 640x480px), we specify the capture and sending period (the value of 60 on the example specifies one delivery every 60 seconds) and then we configure the TOPIC mqtt where the picture will be sent (on this example the topic is FOTO). We click on “SAVE CONFIG” to finish the configuration.
You can make a test and click on the button “TAKE A PHOTO NOW.” If it works, in a few seconds we should see the captured image on the lower part of that same screen.
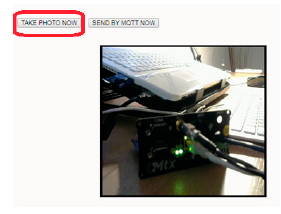
Now we can restart the router and we should be receiving an image via MQTT every minute, once the Titan router has IP connectivity.
Footage Format
Titan router transmits the image via MQTT in this format:
nombreImagen,tamañoImagenEnBytes,[array bytes de la imagen jpeg]
That is, the MQTT message brought to your broker is divided in 3 fields separated by “,” The first one is the name of the image file. The second one is the size of the image file in bytes, and the last parameter is an array of bytes with all the raw content of the image in jpeg.
Capturing and Sending Footage via AT Commands
An important feature of the Titan router is that it is possible to make almost anything via AT commands. We could also take a picture and send it with AT commands. These AT commands can be sent as usual: via Telnet, SSH, HTTP Rest, SMS, Modbus TCP, Modbus RTU, SNMP, etc.
For example, imagine a PLC that takes a picture when it receives data from a sensor, and then sends the picture via MQTT. We would need to send a couple of AT commands via TCP or RTU Modbus to the Titan router (check Application Note 10 to learn how to send AT commands via modbus).
The AT command that allows capturing an image is:
AT^MTXTUNNEL=GETUSBPHOTO
Once this AT command is sent, the router will capture a picture in a few seconds. It will senda n “OK” or “ERROR” depending on the success of the capturing.
The AT commands that allows sending the last capture image is:
AT^MTXTUNNEL=SENDUSBPHOTOMQTT,topic
Once the AT command is sent, the image will be sent via MQTT to the topic specified on the field “topic” of said AT command.


 Les accès par défaut sont :
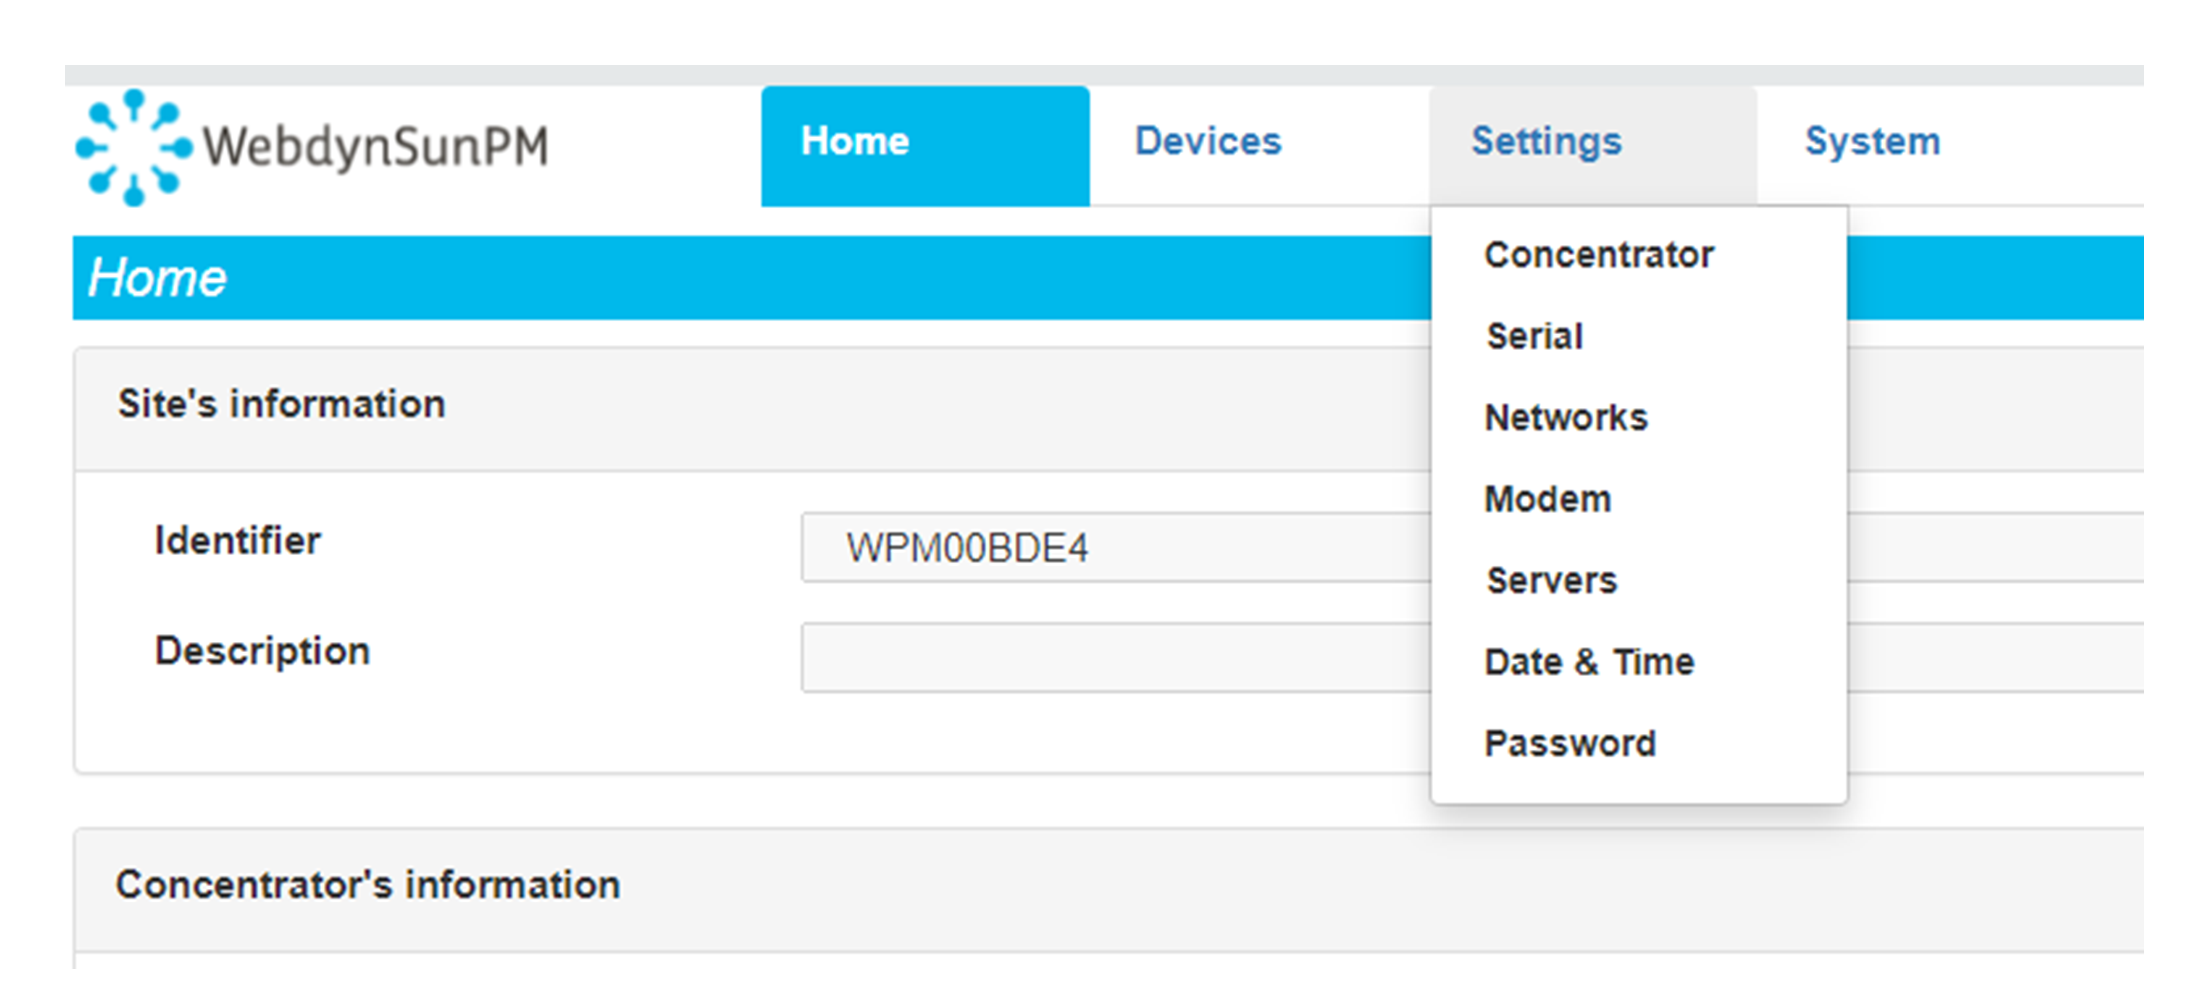 Saisir le mode de connexion « Ethernet » ou « modem » :
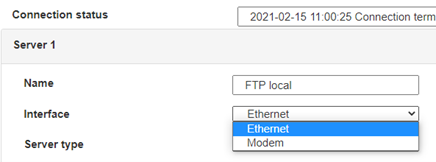 Dans le cas d’une configuration par Ethernet, veiller à ce que les paramètres IP soient compatibles avec l’accès au serveur d’après la configuration du réseau local du concentrateur. Dans le cas d’une connexion par Ethernet, la configuration doit être compatible avec la topologie du réseau local du concentrateur afin qu’il puisse accéder aux serveurs. Cette configuration se fait via la page de configuration « Networks » (voir chapitre 3.2.2.3 : « Réseaux (Networks) »).
Dans le cas d’une connexion par modem, la configuration du modem doit être correcte avant de pouvoir effectuer une connexion. Cette configuration se fait dans la page de configuration « Modem » (voir chapitre 3.2.2.4 : « Modem »).
Les paramètres des serveurs à configurer au minimum sont les suivants :
 Il faut donc configurer les champs : « Interface », « Type », « Server type », « Address », « Port », « Login » et « Password ».
Les autres champs peuvent être laissés aux valeurs par défaut à condition que les répertoires aient été créés correctement auparavant. Voir chapitre 3.1.2 : « Fichiers de configuration » pour plus de détails.


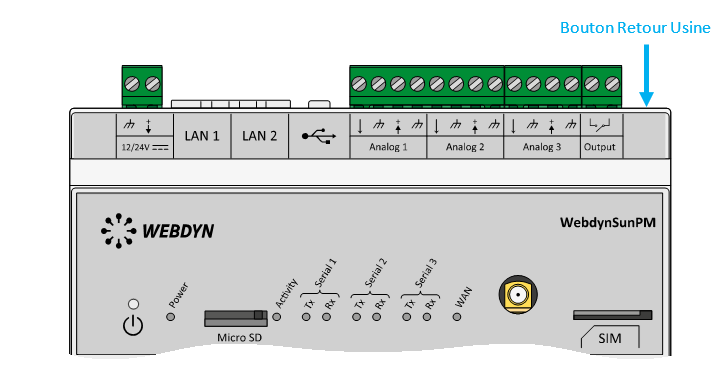 Attendre. Le concentrateur va redémarrer avec sa configuration usine.

