Suchen Sie etwas anderes?
Table of Contents
Introduction
Titan routers can be used as Modbus RTU concentrator or Modbus TCP or both simultaneously. That is, Titan routers are able to read the Modbus registries of third-party devices and send them via MQTT, HTTP/HTTPS or FTP.
This application note shows how to send Modbus registries via HTTPS to Azure, Microsoft IoT platform.

Example Scenario
There is a PLC Schneider M251 connected through Ethernet bus to an MTX-Router-Titan-3G-mini. The MTX-Router-Titan-3G-mini device should read some Modbus registries every minute and send them through HTTPS POST (JSON) via 3G to the Microsoft Azure platform.
Creation of IoT Hub in Azure
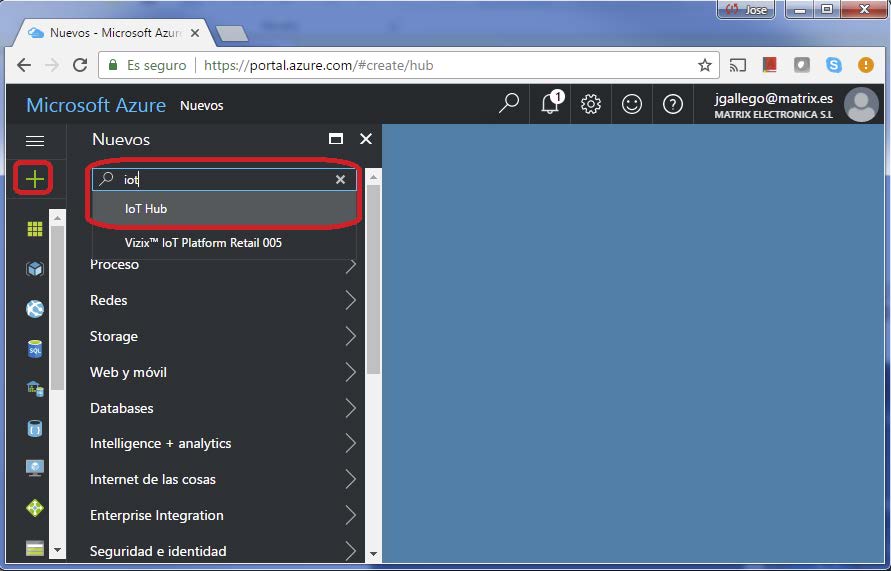
We can create an IoT hub from the Azure portal. To do that, we access https://portal.azure.com and click the “+” button. We enter “iot” in the search field, we will see “IoT hub” and click there.
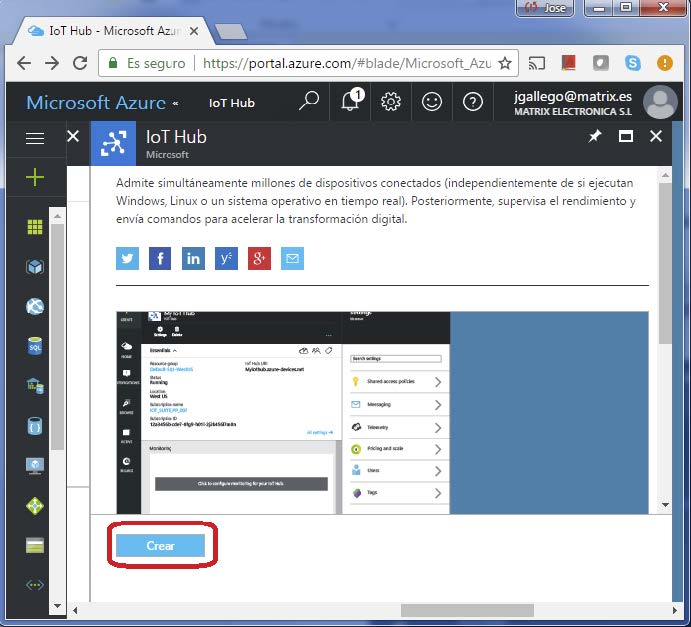
We click on the “IoT hub” blue icon.
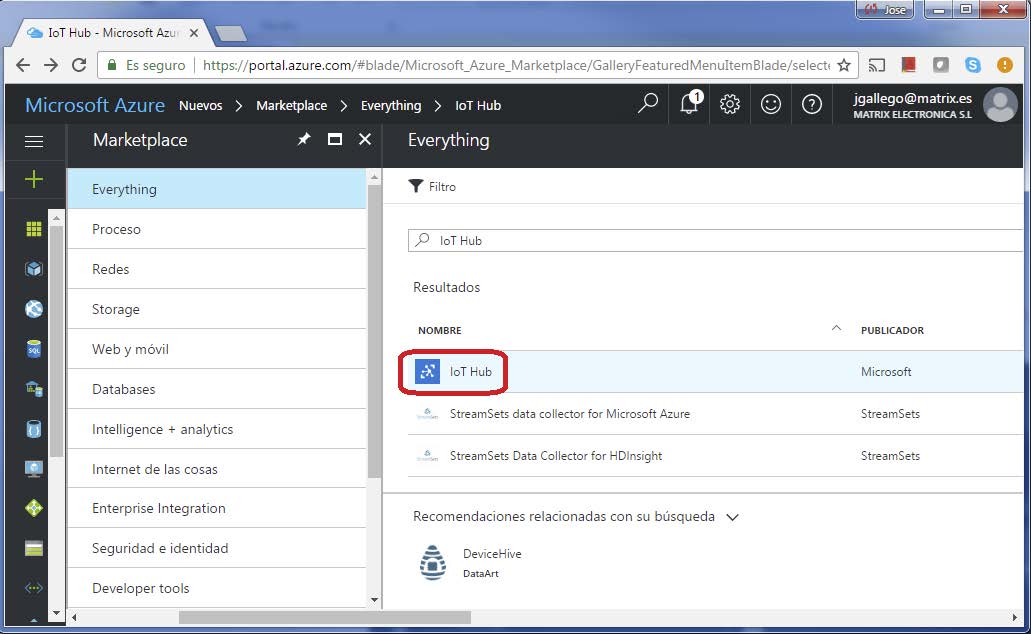
Finally, we will click on the “Create” button.
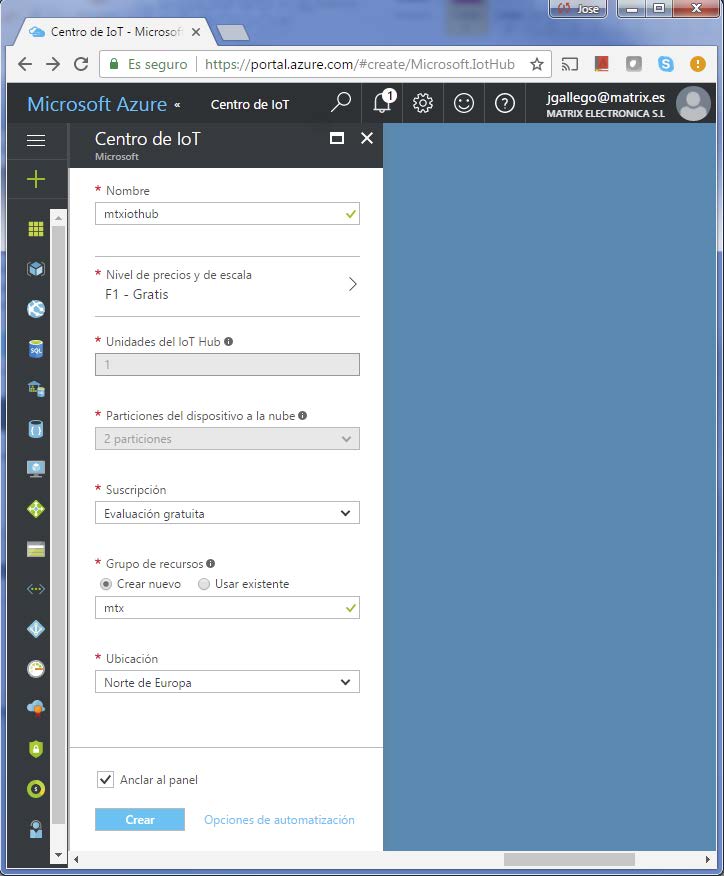
We specify the information of the IoT hub we want to create, choosing a free account that will allow us to send 8000 messages each day. We click on the “Create” button.
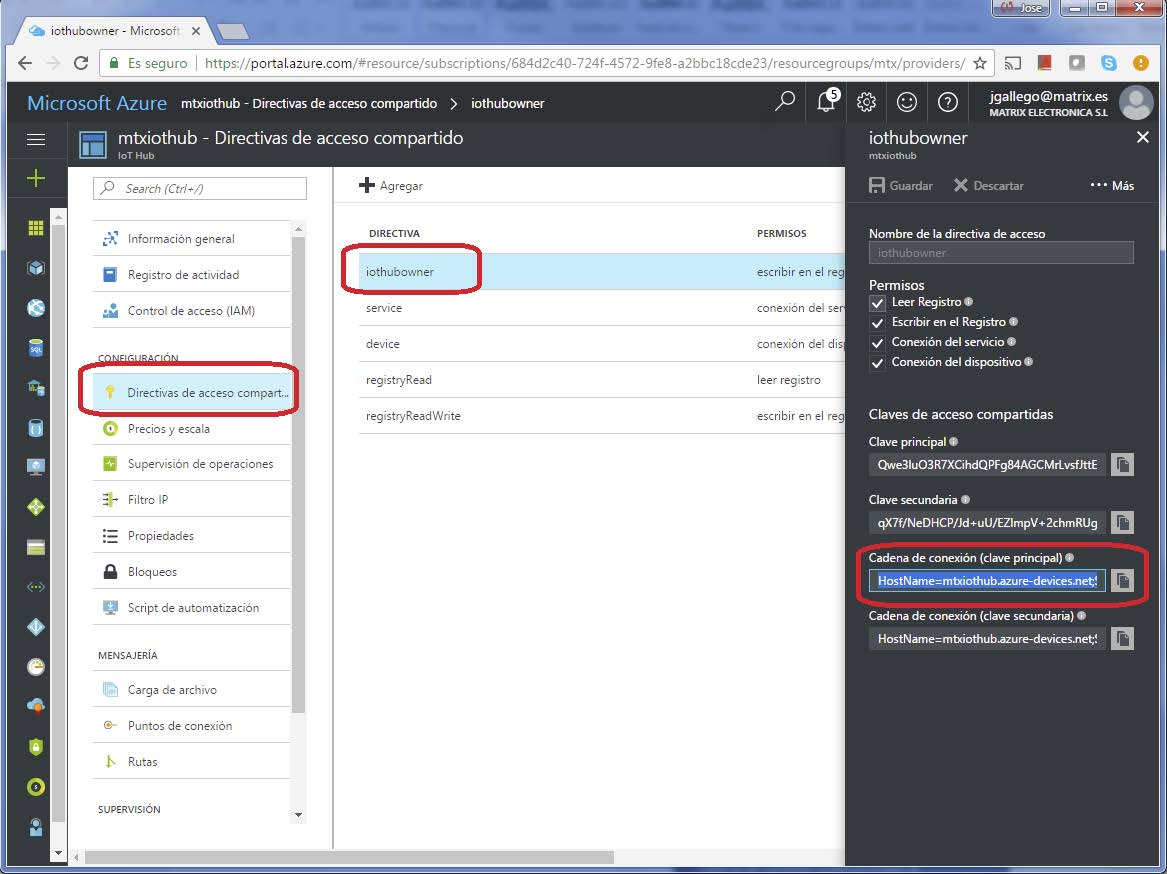
Once we have created the IoT hub, we need to figure out its connection string. To do that, we click on “Shared access guidelines -> iothubowner” in the IoT hub we have created, and we copy and save the text in “Connection string (main key).” We will need it later.
Creation of a Device Inside the IoT Hub we Have Created
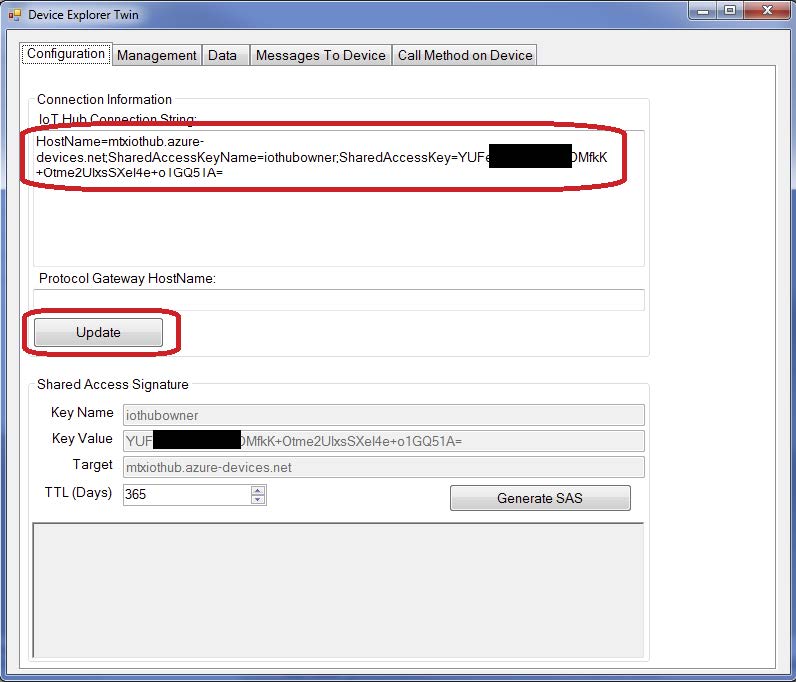
We will use Device Explorer to create a device inside an IoT Hub. You can download it here: https://github.com/Azure/azure-iot-sdks/releases/download/2016-11-7/SetupDeviceExplorer.msi Then we execute the application we find in “Start -> All programs -> Azure IoT Hub -> Device Explorer.” We enter the connection string we saved at the end of step 3. Then we click on the “Update” button.
Then we create a device from the “Management” tab.
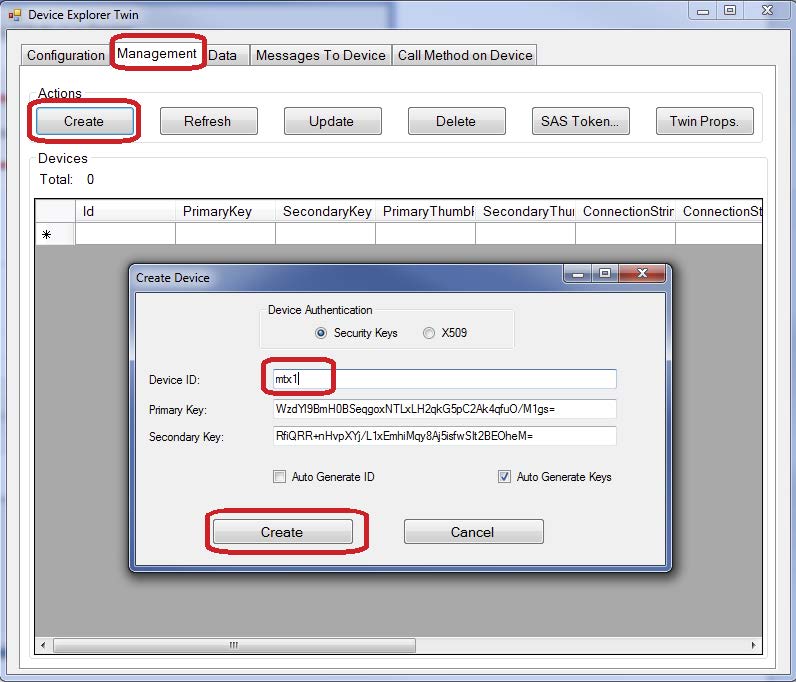
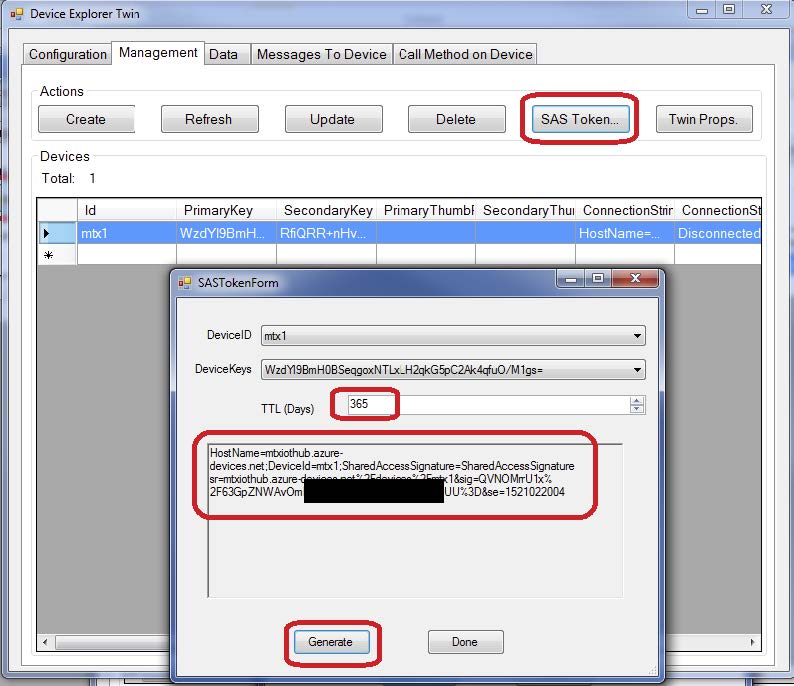
Finally we create a SAS token with, for instance, 365 day validity, as shown in the picture below. We will save the generated key since we will need it to configure the MTX-Router-Titan-3G-mini. This is the exact part we will need:
SharedAccessSignature sr=mtxiothub.azure-devices.net%2Fdevices%2Fmtx1&sig=QVNOMrrU1x%2F63GpZNWAvOmXXXXXXXXXXXXXXXXXXXUU%3D&se=1521022004
Configuration of the MTX-Router-Titan mini 3G
In this example we will focus on the configuration related to the reading of the Modbus variables and sending them to Azure. Naturally, to accomplish this example, the section “Wan > Basic Settings” of the router needs to be properly configured if we want to send the data via 3G.
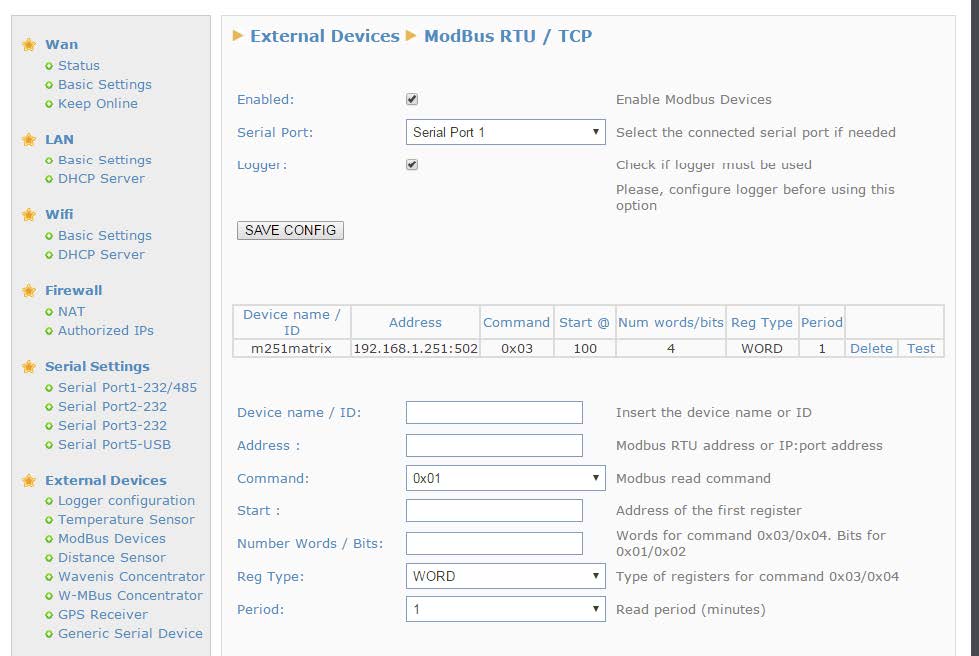
Let’s say we want to read the Modbus registries 100,101,102 and 103 of the PLC that has the 192.168.1.251 IP LAN and a Modbus TCP server receiving data in the 502 port. This should be the exact configuration that we should apply in the section “External Devices > Modbus Devices.”
Finally we need to configure the Logger. That is, the router service that sends the data to a server, in this case to Azure. To do that we will go to the section “External Devices > Logger Configuration.”
In that section, we need to specify the configuration shown in the next picture.
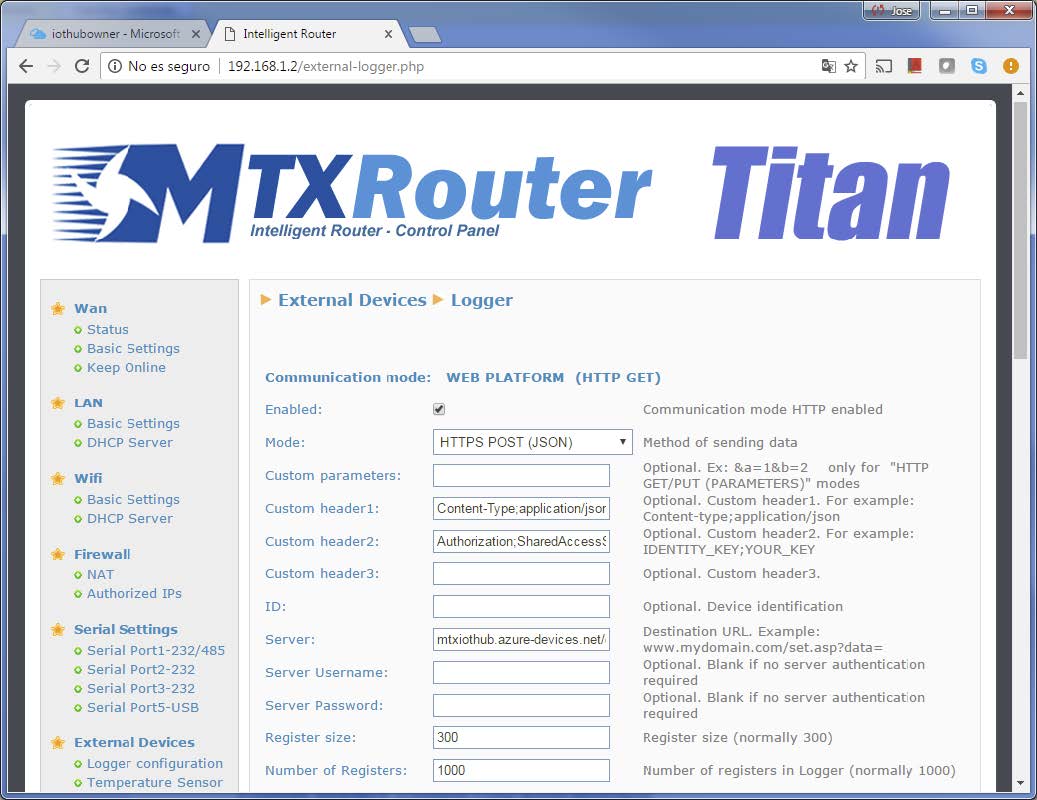
It is important to specify HTTPS POST (JSON) as the sending mode.
In “Custom header1” we enter: Content-Type;application/json
In “Custom header2” we enter the SAS token generated before:
Authorization;SharedAccessSignature sr=mtxiothub.azure-devices.net%2Fdevices%2Fmtx1&sig=QVNOMrrU1x%2F63GpZNWAvOmXXXXXXXXXXXXXXXXXXXXUU%3D&se=1521022004
Notice how the semicolon “;” is the sign used after “Content-Type” and “Authorization.”
In “Server” we enter the url of our server that has this format:
{iotHub}.azure-devices.net/devices/{deviceId}/messages/events?api-version=2016-11-14
In the case of this example:
mtxiothub.azure-devices.net/devices/mtx1/messages/events?api-version=2016-11-14
In case we also want MTX-Router-Titan-3G-mini to send recurring information about its status, coverage, IP… we can do that from the menu “Other > Private DNS.” We specify the same server and headers as in the last picture.
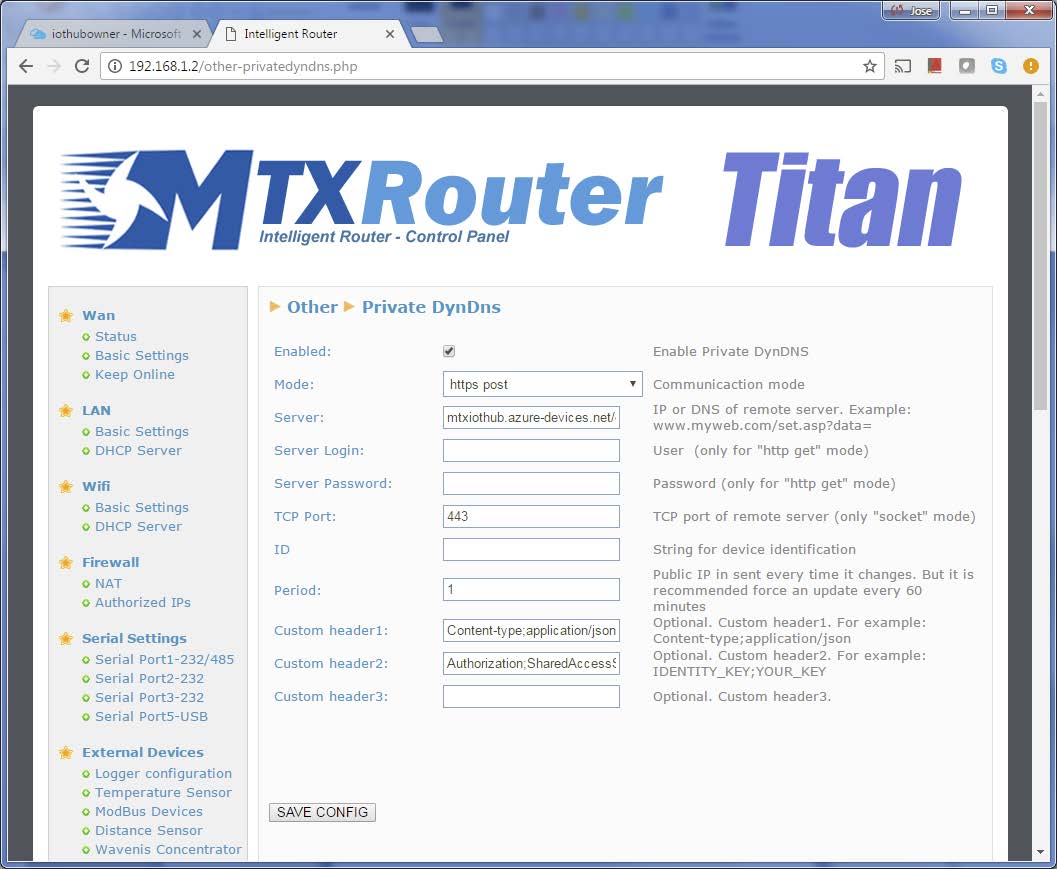
Once we do that, we need to restart the router. After it restarts and connects to the Internet, we can verify how it gathers the Modbus registries from the PLC and sends them to Azure.
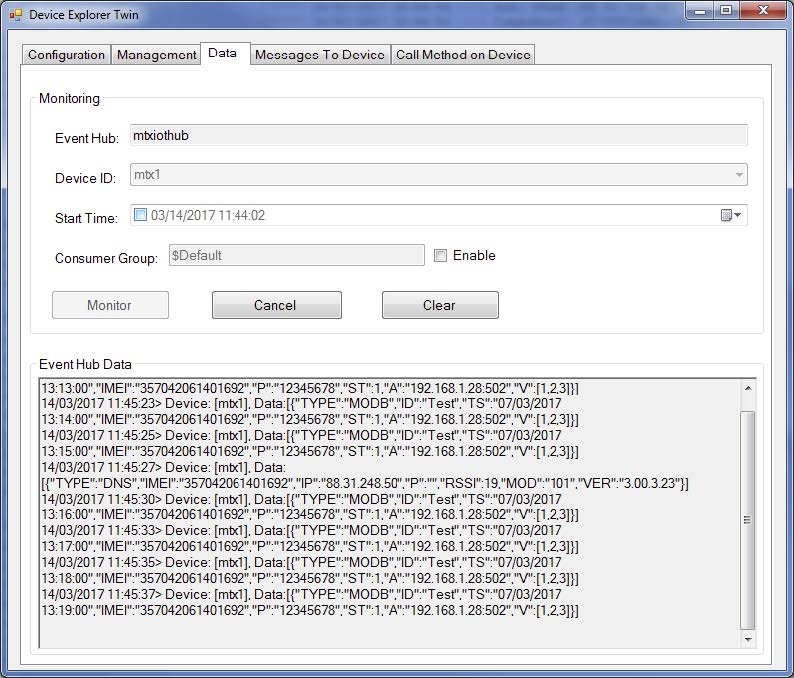
To see the data received in Azure, we can use the same “Device Explorer” tool. To do that we just need to go to the “Data” tab and click on the “Monitor” button.
Now we can see the JSON Modbus variables read as well as the status ones.
For questions related with Azure services, contact Microsoft technical assistance.



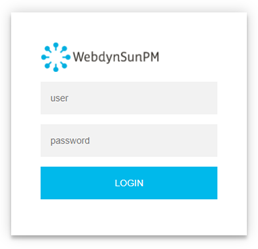 Les accès par défaut sont :
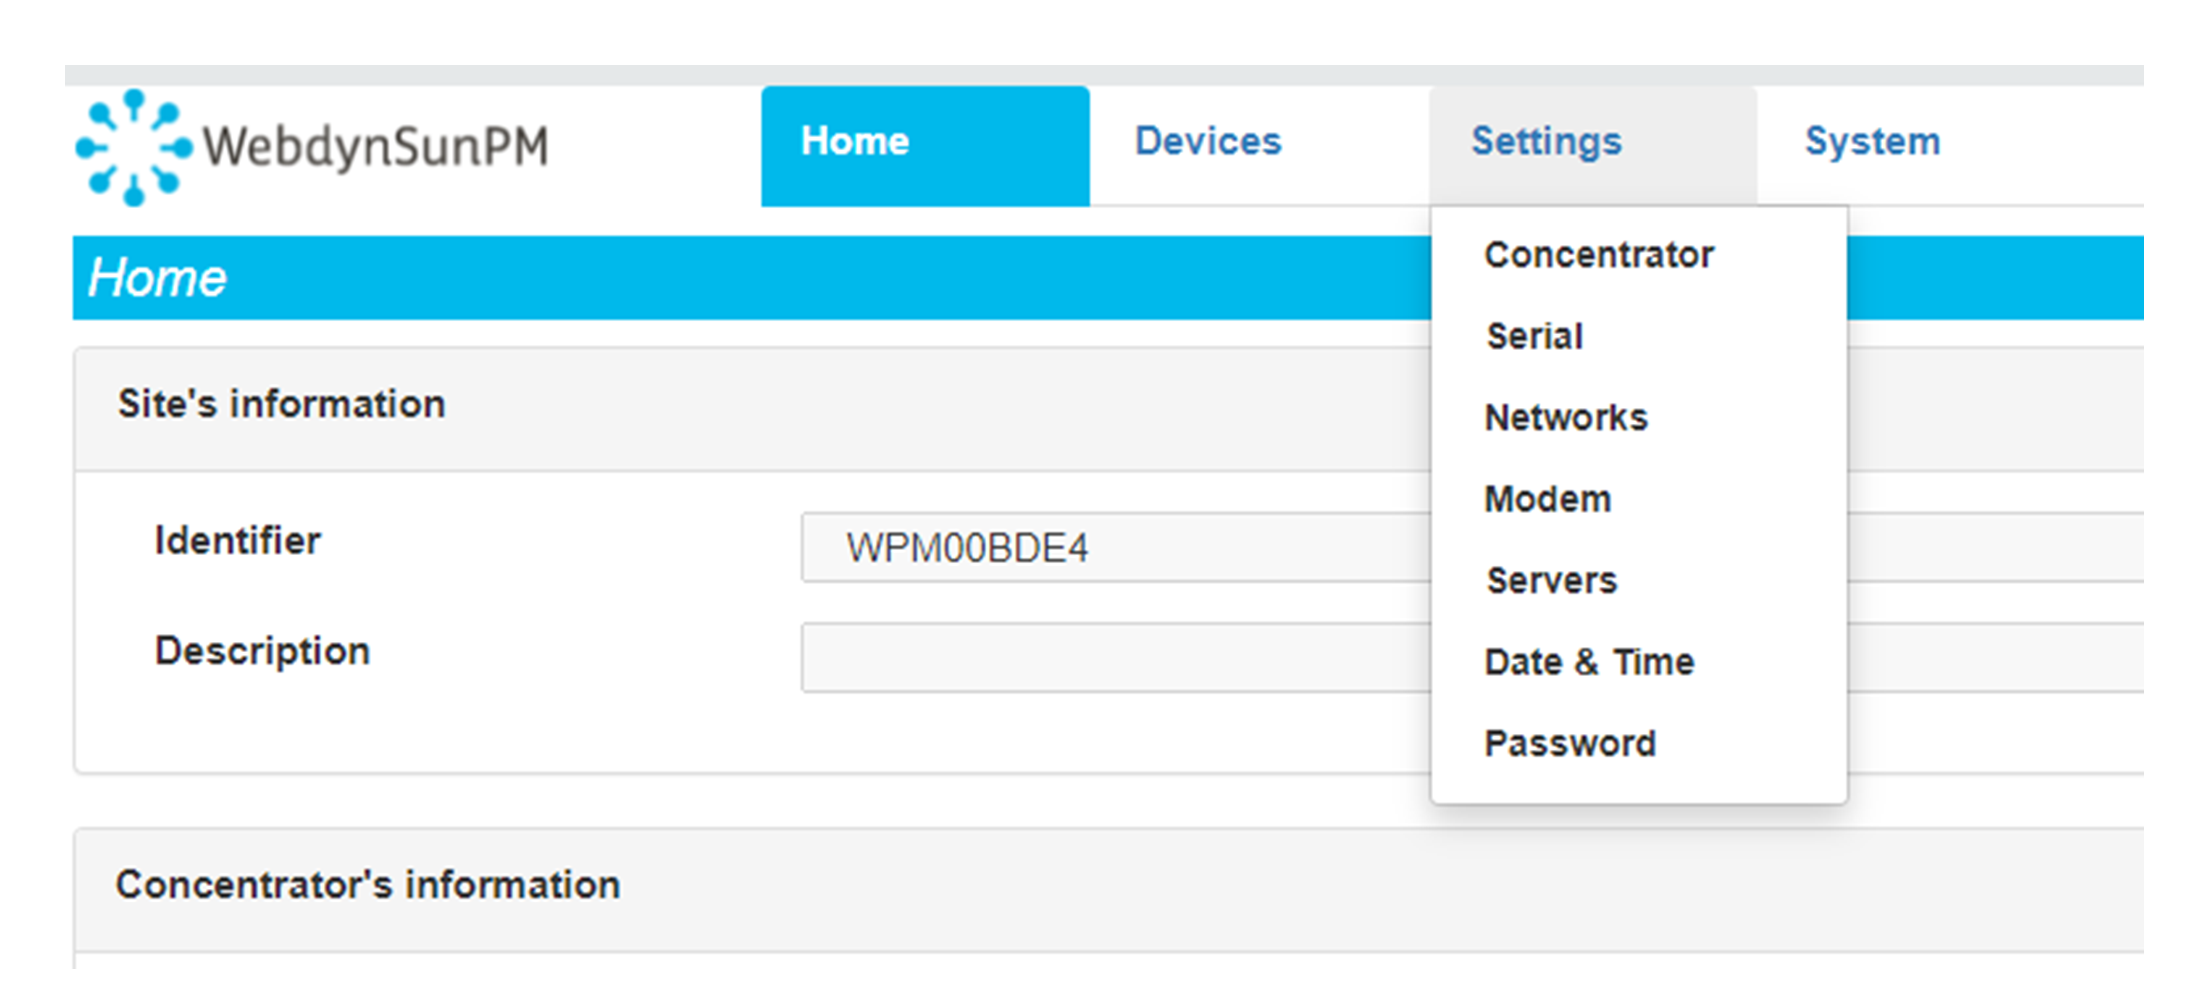 Saisir le mode de connexion « Ethernet » ou « modem » :
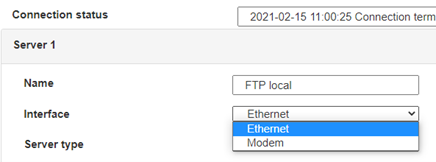 Dans le cas d’une configuration par Ethernet, veiller à ce que les paramètres IP soient compatibles avec l’accès au serveur d’après la configuration du réseau local du concentrateur. Dans le cas d’une connexion par Ethernet, la configuration doit être compatible avec la topologie du réseau local du concentrateur afin qu’il puisse accéder aux serveurs. Cette configuration se fait via la page de configuration « Networks » (voir chapitre 3.2.2.3 : « Réseaux (Networks) »).
Dans le cas d’une connexion par modem, la configuration du modem doit être correcte avant de pouvoir effectuer une connexion. Cette configuration se fait dans la page de configuration « Modem » (voir chapitre 3.2.2.4 : « Modem »).
Les paramètres des serveurs à configurer au minimum sont les suivants :
 Il faut donc configurer les champs : « Interface », « Type », « Server type », « Address », « Port », « Login » et « Password ».
Les autres champs peuvent être laissés aux valeurs par défaut à condition que les répertoires aient été créés correctement auparavant. Voir chapitre 3.1.2 : « Fichiers de configuration » pour plus de détails.


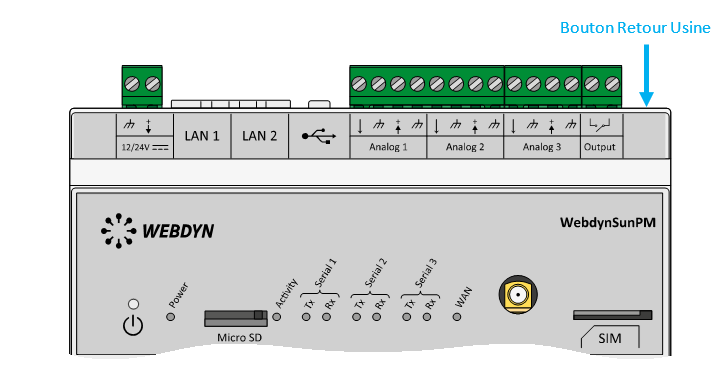 Attendre. Le concentrateur va redémarrer avec sa configuration usine.

