Suchen Sie etwas anderes?
Table of Contents
Access Restriction
Use access restrictions, you can block or allow specific types of Internet applications. You can set specific PC-based Internet access policies. This feature allows you to customize up to ten different Internet Access Policies for particular PCs, which are identified by their IP or MAC addresses.
Two options in the default policy rules: “Filter” and “reject”. If select “Deny”, will deny specific computers to access any Internet service at a particular time period. If choose “filter”, it will block specific computers to access the specific sites at a specific time period. You can set up 10 Internet access policies filtering specific PCs access Internet services at a particular time period.
Access Policy: You may define up to 10 access policies. Click Delete to delete a policy or Summary to see a summary of the policy.
Status: Enable or disable a policy.
Policy Name: You may assign a name to your policy.
PCs: The part is used to edit client list, the strategy is only effective for the PC in the list.
Set up Internet access policy:
- Select the policy number (1-10) in the drop-down menu.
- For this policy is enabled, click the radio button next to “Enable”
- Enter a name in the Policy Name field.
- Click the Edit List of PCs button.
- On the List of PCs screen, specify PCs by IP address or MAC address. Enter the appropriate IP addresses into the IP fields. If you have a range of IP addresses to filter, complete the appropriate IP Range fields. Enter the appropriate MAC addresses into the MAC fields.
- Click the Apply button to save your changes. Click the Cancel button to cancel your unsaved changes. Click the Close button to return to the Filters screen.
- If you want to block the listed PCs from Internet access during the designated days and time, then keep the default setting, Deny. If you want the listed PCs to have Internet filtered during the designated days and time, then click the radio button next to Filter.
- Set the days when access will be filtered. Select Everyday or the appropriate days of the week.
- Set the time when access will be filtered. Select 24 Hours, or check the box next to From and use the drop-down boxes to designate a specific time period.
- Click the Add to Policy button to save your changes and active it.
- To create or edit additional policies, repeat steps 1-9.
- To delete an Internet Access Policy, select the policy number, and click the Delete button.
Website Blocking by URL Address: You can block access to certain websites by entering their URL.
Website Blocking by Keyword: You can block access to certain website by the keywords contained in the web page.
NOTE: The default factory value of policy rules is “filtered”. If the user chooses the default policy rules for “refuse”, and editing strategies to save or directly to save the settings. If the strategy edited is the first, it will be automatically saved into the second, if not, please keep the original number.
Turn off the power of the router or reboot the router can cause a temporary failure. After the failure of the router, if can not automatically synchronized NTP time server, you need to ensure the correct implementation of the relevant period control function.




 Enter the “ethernet” or “modem” connection type:
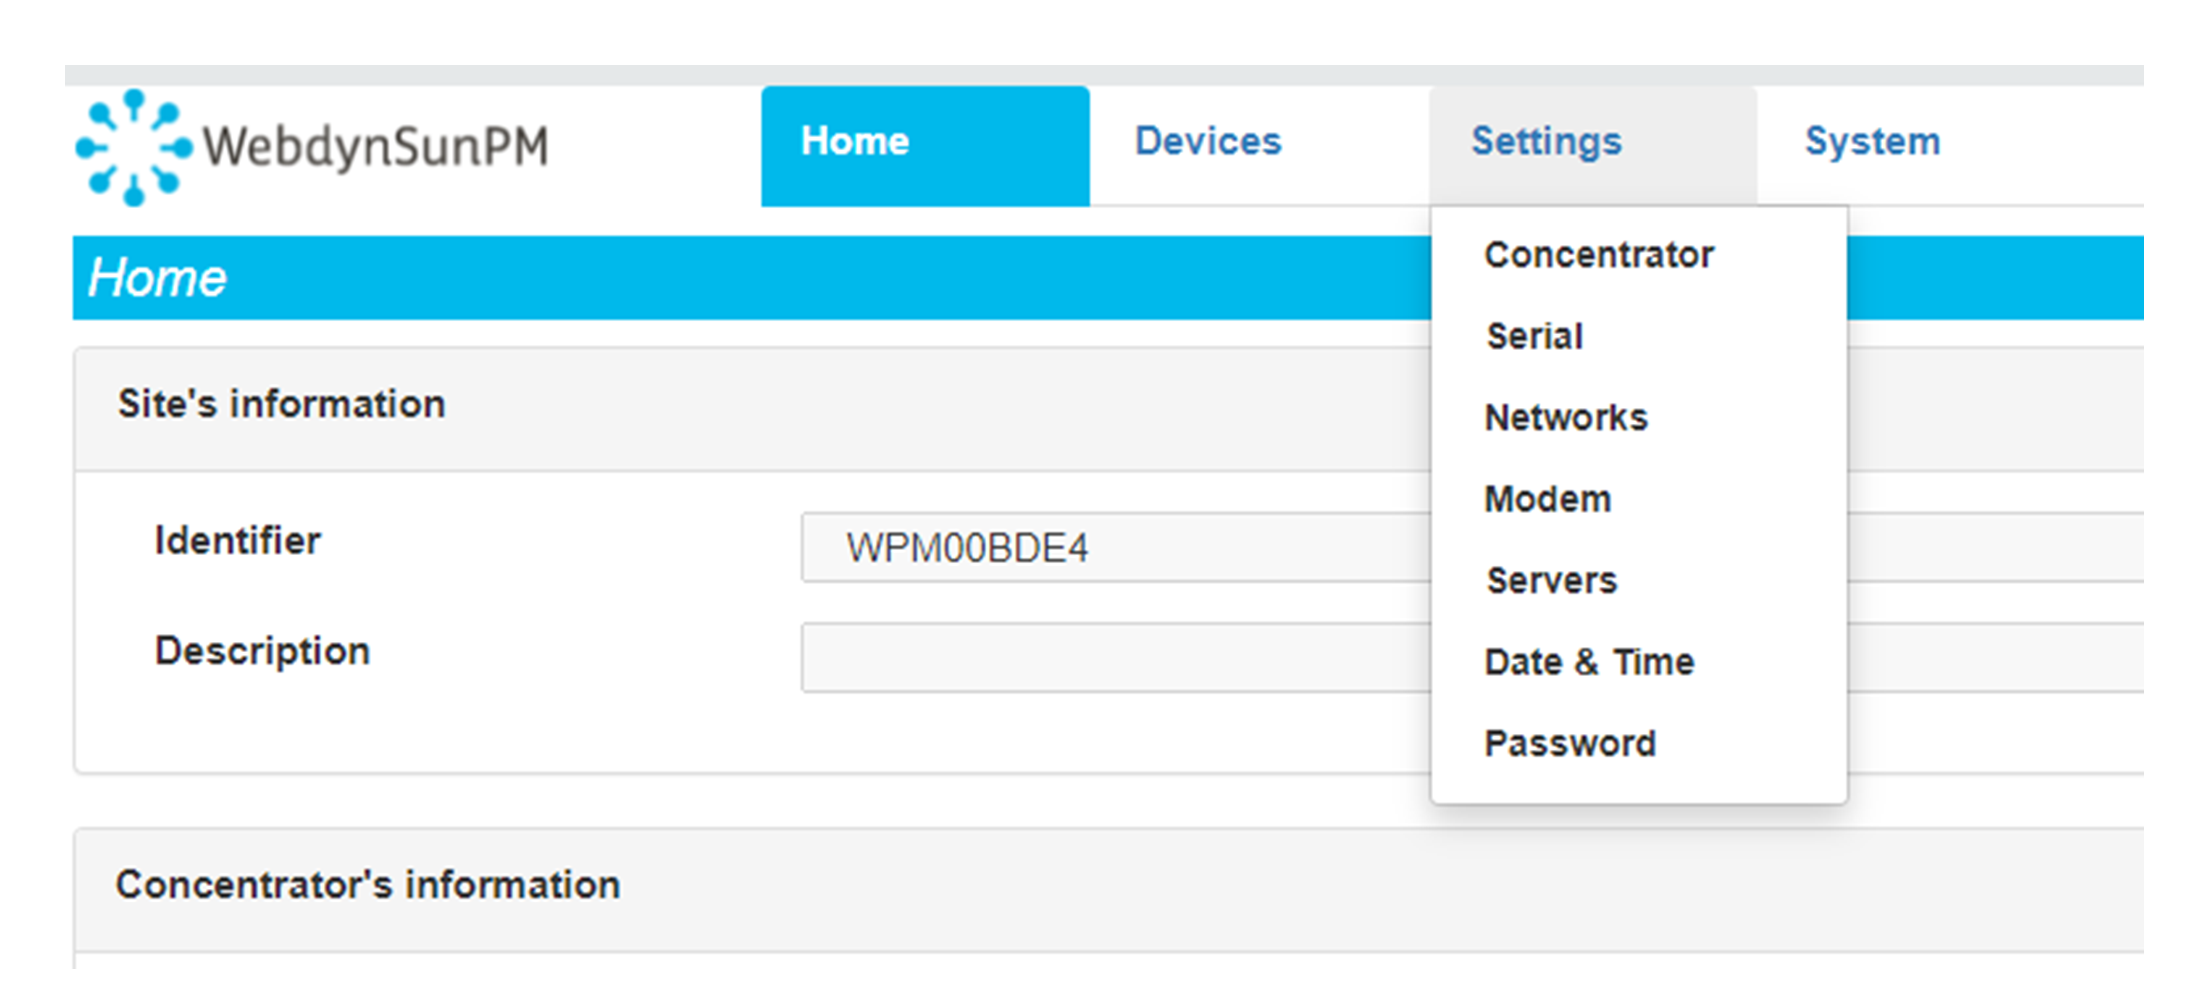
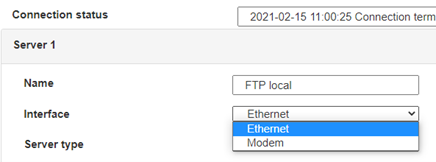 For an ethernet configuration, make sure the IP parameters are compatible with server access according to the concentrator local network configuration. For an ethernet connection, the configuration must be compatible with the concentrator’s local network topology so that it can access the servers. This configuration is done from the “Networks” configuration page (see section 3.2.2.3: “Networks”).
For a modem connection, the modem configuration must be correct before a connection can be set up. This configuration is done from the “Modem” configuration page (see section 3.2.2.4: “Modem”).
The parameters for the servers to be configured are at least the following:
 Therefore the following fields need to be configured: “Interface”, “Type”, “Server type”, “Address”, “Port”, “Login” and “Password”.
The other fields can be left at the default values subject to the directories having been properly created beforehand. See section 3.1.2: “Configuration files” for more details.


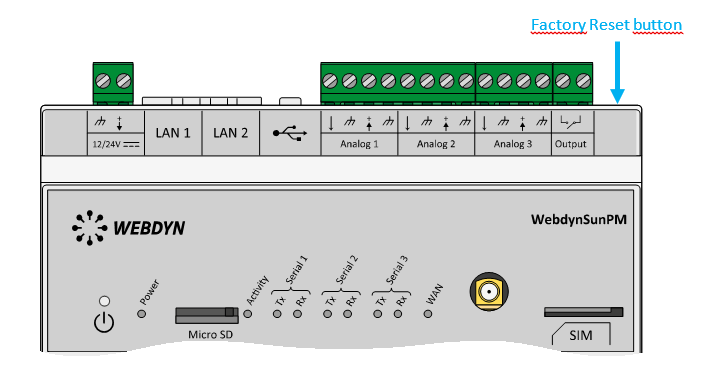 Wait. The concentrator will reboot using its factory configuration.

